CJです。
今回は Cloud Assembly 入門編の第3部となります。第1~2部をご覧になっていない方は、下記の構成表リンク経由でご確認いただければと思います。
Cloud Assembly 入門編の構成
| 部 | 内容 | リンク |
| 1/4 | ① Create Cloud Account | 1部へ |
| 2/4 | ② Create Cloud Zone ③ Create Project | 2部へ |
| 3/4 | ④ Create Flavor Mapping ⑤ Create Image Mapping | 本記事 |
| 4/4 | ⑥ Create and Deploy Blueprint | 4部へ |
また、Cloud Assembly の Setup Diagram における本記事の範囲は以下となります。
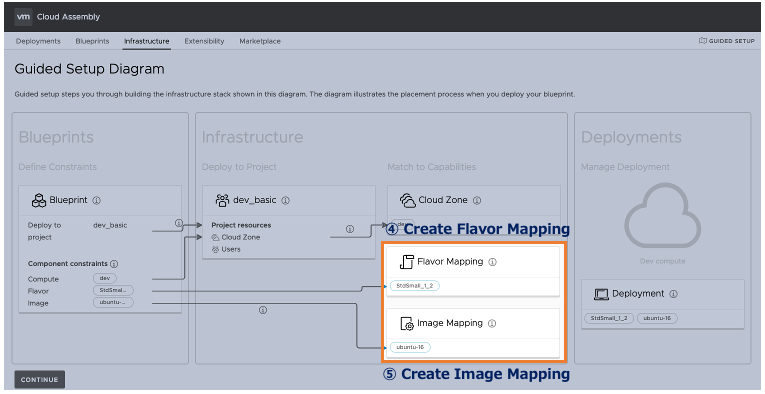
では、早速 3部の Flavor Mapping の作成から見て行きましょう。
④ Create Flavor Mapping
Flavor Mapping では、特定の Cloud Account / Region に対するターゲットの展開サイズを定義します。作成ページへのアクセスは “Cloud Assembly > Infrastructure > Configure (Flavor Mappings) > [NEW FLAVOR MAPPING]” より可能です。
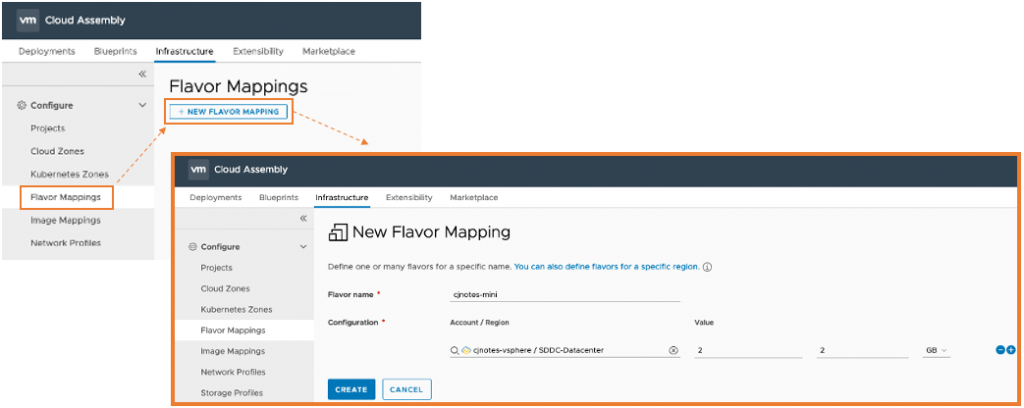
環境に適した展開サイズを設定してください。(以下は、本記事の参考例となります。)
・Flavor name : cjnotes-mini
・Configuration (Account / Region) : cjnotes-vsphere / SDDC-Datacenter
・Configuration (Value) : 2 (CPU) / 2 (MEM)
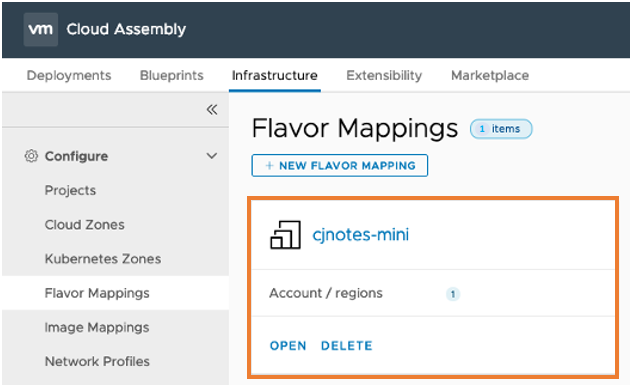
設定が終わったら、[CREATE] ボタンにて Flavor Mapping を作成します。すると、以下の通りに作成した Flavor Maaping (cjnotes-mini)が表示されます。
⑤ Create Image Mapping
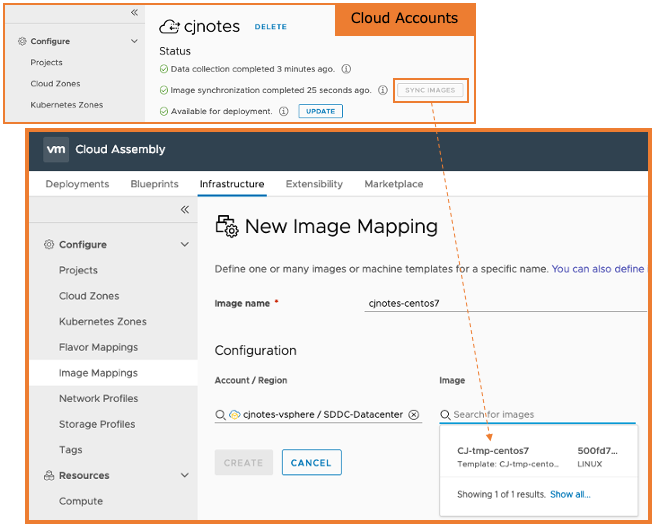
Image Mapping では、特定の Cloud Account / Region に対するターゲットの展開 OS を定義します。作成ページへのアクセスは “Cloud Assembly > Infrastructure > Configure (Image Mappings) > [NEW IMAGE MAPPING]” より可能です。

想定している展開 OS を設定してください。(以下は、本記事の参考例となります。)
※ VMConAWS 側の vCenter には既に CentOS7 のテンプレートが登録されている状態となります。Cloud Account に紐づいた展開先にテンプレートが登録されていない場合は、登録を行っていただいた後に次へ進んでください。なお、本記事ではテンプレートの登録方法については割愛させていただきます。VMware社のドキュメントなどをご参照ください。
・Image name : cjnotes-centos7
・Configuration (Account / Region) : cjnotes-vsphere / SDDC-Datacenter
・Configuration (Image) : CJ-tmp-centos7
Tip!
もし、Image サーチを行っても登録済みのテンプレートが表示されない場合は、”Cloud Assembly > Infrastructure > Connections (Cloud Accounts) > [SYNC IMAGES]” にてイメージの再同期を行ってください。
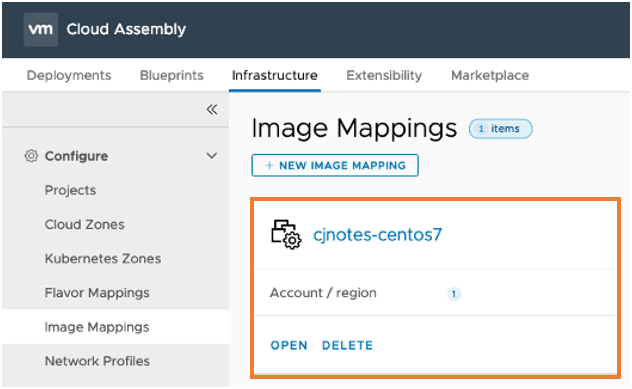
設定が終わったら、[CREATE] ボタンにて Image Mapping を作成します。すると、以下の通りに作成した Image Mapping (cjnotes-centos7)が表示されます。
これで 3部は完了となります。引き続き、第4部へ…引き続き 4部もお楽しみください…
To be continued…
[参考情報]
Learn more about flavor mappings in Cloud Assembly
Learn more about image mappings in Cloud Assembly
コメントを残す